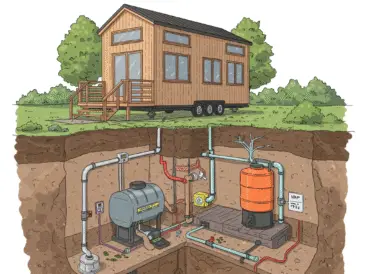
Installing a septic system isn’t exactly what most people dream about when they imagine building their perfect home, but getting it right can mean the difference between decades of trouble-free waste management and a nightmare that literally stinks. Whether you’re building your first home on rural land or replacing an aging system, proper land preparation is the foundation of septic success – and skipping steps here is like building a house on quicksand.
At septicservicecenter.com, we’ve seen countless homeowners learn the hard way that rushing into septic installation without proper preparation leads to costly mistakes, failed inspections, and systems that fail prematurely. This comprehensive guide will walk you through every critical step to prepare your land for septic installation, ensuring your investment protects your property value and keeps your family healthy for years to come.
Understanding Septic System Requirements
Local Regulations and Permits
Before you even think about breaking ground, you’ll need to navigate the maze of local regulations that govern septic installations. Every municipality has specific requirements, and what works in one county might be completely prohibited in the next. Start by contacting your local health department or building authority to understand permit requirements, setback distances, and system specifications.
Most areas require detailed site plans, soil testing reports, and system design drawings before issuing permits. The permit process typically takes 2-6 weeks, but can stretch longer during busy seasons or if your application needs revisions. Don’t let impatience here derail your timeline – proper permits protect you legally and ensure your system meets current environmental standards.
Soil Testing and Percolation Test
Your soil is essentially the engine of your septic system, and not all soils are created equal. A professional soil evaluation examines soil composition, depth to bedrock or groundwater, and seasonal high water table levels. The percolation test (or “perc test”) measures how quickly water moves through your soil – too fast and contaminants reach groundwater, too slow and your system backs up.
“I’ve seen homeowners spend thousands on septic systems only to discover their soil won’t support conventional drainage. Soil testing isn’t optional – it’s the roadmap for everything that follows.”
– Maria Rodriguez, Licensed Soil Scientist
Professional soil testing costs $800-1,500 but can save you from installing the wrong system type. Clay soils might require engineered solutions, while sandy soils need larger drain fields. Rocky terrain could mean costly excavation or alternative system designs.
Septic System Design Considerations
Modern septic systems aren’t one-size-fits-all solutions. System design depends on household size, soil conditions, local regulations, and site constraints. Conventional gravity systems work well in ideal soil conditions, while advanced treatment units might be required for challenging sites.
Consider your long-term needs during design. Planning for future additions or increased capacity now is much cheaper than retrofitting later. Your system should handle peak loads during holidays or family gatherings without overwhelming the drain field.
Site Evaluation and Planning
Selecting the Appropriate Location
Location selection requires balancing multiple factors that might seem contradictory. Your septic system needs to be close enough to your home for reasonable connection costs but far enough away to prevent odors and potential contamination. Most codes require minimum distances from wells (100+ feet), property lines (10+ feet), and structures (20+ feet).
Look for naturally well-drained areas with gentle slopes between 1-3%. Avoid low-lying areas where water collects, steep slopes that could cause erosion, and areas with heavy tree cover that complicates access and maintenance. The ideal location has good soil conditions, reasonable excavation access, and room for future repairs or expansion.
Considering Property Layout and Future Use
Think beyond immediate needs when planning septic placement. That perfect spot for your drain field might conflict with future pool plans, garden expansions, or property improvements. Heavy traffic over drain fields compacts soil and damages pipes, so avoid areas where vehicles or heavy equipment regularly travel.
Consider maintenance access in your planning. Septic tanks need regular pumping every 3-5 years, and pump trucks need reasonable access. Planning maintenance access now prevents costly access issues later when your landscaping is established.
Checking Proximity to Water Sources and Boundaries
Water source protection isn’t just good neighborly practice – it’s legally required and environmentally critical. Wells, springs, streams, and lakes all have mandated setback distances that vary by jurisdiction and water source type. Private wells typically require 100-foot minimum distances, while public water sources might require 200+ feet.
Property boundary considerations go beyond legal requirements. Poor septic placement can affect neighbor relationships and property values. Even if you meet minimum setbacks, consider prevailing winds, drainage patterns, and sight lines when finalizing placement.
Land Clearing and Site Preparation
Removing Vegetation, Debris, and Obstacles
Site clearing involves more than just cutting down trees. Remove all vegetation, roots, stumps, and organic matter from the installation area. Decomposing organic material creates voids and uneven settling that can damage septic components over time.
Mark underground utilities before any clearing begins – hitting electrical, gas, or water lines turns a routine project into an expensive emergency. Most areas offer free utility marking services, but call several days ahead as scheduling fills up quickly.
Save valuable topsoil during clearing for later restoration. Proper topsoil helps establish vegetation over completed drain fields, preventing erosion and improving system longevity.
Grading and Leveling Ground as Needed
Proper grading ensures water flows away from septic components while maintaining optimal system function. Septic tanks need level installation to function correctly, while drain fields require specific slopes for even effluent distribution.
“Grading mistakes are expensive to fix after installation. Getting the slope right the first time prevents ponding, system failure, and costly repairs down the road.”
– James Patterson, Licensed Excavation Contractor
Professional grading typically costs $1,500-3,000 but ensures proper water management around your system. DIY grading is possible for simple sites, but complex terrain or drainage issues benefit from professional expertise.
Ensuring Access for Construction Equipment
Septic installation requires heavy equipment including excavators, concrete trucks, and pump trucks. Ensure access routes can handle equipment weight and width requirements. Temporary access roads might be necessary for challenging sites.
Consider seasonal access limitations. Spring thaw and heavy rains can make sites inaccessible for weeks, delaying installation and increasing costs. Plan installation timing around weather patterns and site conditions.
Utility and Infrastructure Considerations
Identifying Underground Utilities
Underground utilities pose serious safety and financial risks during excavation. Gas lines, electrical cables, water mains, and communication lines often run in unexpected locations. Professional utility marking identifies most utilities, but private lines between buildings might not appear on utility maps.
Hand-dig around marked utilities to verify exact locations before excavation begins. Utility strikes can cause service interruptions, expensive repairs, and serious safety hazards including electrocution and gas leaks.
Planning for Water Supply Connections
Coordinate septic installation with water supply planning to ensure adequate separation distances and avoid conflicts during construction. Well drilling and septic installation often happen simultaneously during new construction, requiring careful coordination to prevent contamination.
Water supply capacity affects septic system sizing. High-capacity wells might enable larger systems, while limited water supplies might require conservation-focused system designs.
Ensuring Proper Drainage and Slope
Surface drainage protects septic systems from water infiltration that can overwhelm treatment capacity. Direct roof runoff, surface water, and foundation drainage away from septic components using gutters, french drains, or grading.
Subsurface drainage might be necessary in areas with high groundwater or clay soils. Professional drainage solutions prevent water infiltration while maintaining system function during wet periods.
Hiring a Licensed Septic Installer
Importance of Professional Installation
Septic installation isn’t a typical DIY project, even for experienced homeowners. Licensed installers understand local codes, proper installation techniques, and system requirements that ensure long-term reliability. Professional installation typically includes warranties and guarantees that protect your investment.
Licensed installers carry insurance that protects against installation errors and construction damage. DIY installation might save money upfront but can void equipment warranties and create liability issues if problems develop.
Questions to Ask Potential Contractors
Vet potential installers carefully to avoid costly mistakes and substandard work. Ask for current licensing, insurance certificates, and recent references. Experienced installers should provide detailed written estimates that include materials, labor, permits, and cleanup.
Request references from recent projects and follow up with previous customers about work quality, timeliness, and problem resolution. Established installers welcome reference checks and provide contact information readily.
“The cheapest bid usually isn’t the best value in septic installation. Look for installers who explain the process, provide detailed estimates, and stand behind their work with solid warranties.”
– Robert Chen, Master Plumber and Septic Specialist
Coordinating with Your Installer on Timeline and Readiness
Successful septic installation requires coordination between multiple parties including excavators, installers, inspectors, and utility companies. Establish clear timelines that account for weather delays, permit processing, and material delivery.
Confirm site readiness requirements with your installer before work begins. Incomplete site preparation can delay installation and increase costs when crews arrive to unusable sites.
Final Pre-Installation Steps
Verifying Permits and Approvals are in Place
Double-check permit status before installation begins. Expired permits, missing approvals, or regulation changes can halt work and create costly delays. Keep permit documentation readily available for inspectors and installers.
Understand inspection requirements and timing. Some jurisdictions require multiple inspections during installation, while others inspect only completed systems. Missing required inspections can mean expensive rework.
Marking the System Layout on Property
Clearly mark septic component locations using spray paint or flags before installation begins. Accurate marking prevents placement errors and ensures components meet setback requirements. Include tank location, drain field boundaries, and distribution box placement in your marking.
Photograph marked layouts for your records. These photos help with future maintenance, repairs, and property improvements that might affect septic components.
Preparing for Inspection if Required
Schedule required inspections according to local requirements and installer recommendations. Some areas require excavation inspections before component installation, while others inspect after completion.
Ensure site access for inspection vehicles and personnel. Clear weather and good site conditions help inspections proceed smoothly without delays or complications.
Conclusion
Proper land preparation for septic installation requires careful planning, professional expertise, and attention to regulatory requirements. From initial soil testing through final inspection scheduling, each step builds toward a system that protects your family’s health and your property investment for decades.
Following these preparation steps helps ensure smooth installation, regulatory compliance, and long-term system reliability. While the process might seem overwhelming, working with qualified professionals and taking time for proper preparation pays dividends in system performance and peace of mind.
Ready to start your septic installation project with confidence? Contact the experts at septicservicecenter.com for professional guidance on site evaluation, system design, and installation planning. Our experienced team helps homeowners navigate every aspect of septic installation, from initial planning through final inspection. Don’t let poor preparation compromise your septic investment – get expert advice that ensures your project succeeds from day one.


