So you’ve decided to take the plunge and install a new septic system – congratulations on joining the ranks of homeowners who understand that what goes down must be properly processed! While the thought of a six-week installation timeline might seem daunting, understanding each phase of the process will help you navigate this underground adventure with confidence. Whether you’re replacing an aging system or installing one for new construction, knowing what to expect (and when to expect it) can save you from unpleasant surprises and keep your project flowing smoothly.
Why Understanding Your Septic Installation Timeline Matters
Installing a septic system isn’t like ordering takeout – you can’t just call someone up and have it ready in 30 minutes or less. This complex process involves multiple phases, various professionals, and yes, quite a bit of patience. The typical septic system installation takes about six weeks from start to finish, though this can vary based on soil conditions, weather, permit processing times, and the complexity of your chosen system.
Understanding this timeline helps you plan accordingly, whether you’re coordinating with builders, arranging temporary accommodations, or simply managing your expectations. After all, knowledge is power, and in the septic world, power means avoiding the kind of backup situations nobody wants to deal with.
Week 1: Pre-Installation Phase – Laying the Groundwork
Site Evaluation and Soil Testing
Your septic journey begins with what’s essentially a soil science field trip. A qualified professional will conduct a percolation test (or “perc test”) to determine how quickly water moves through your soil. This isn’t just academic curiosity – your soil’s drainage characteristics will determine what type of system you need and where it can be placed on your property.
During this phase, expect someone to dig several test holes around your property and conduct various tests. Don’t worry if your yard looks like a gopher convention afterward – this temporary disruption is crucial for ensuring your system works properly for decades to come.
Permitting and Regulatory Compliance
Welcome to the exciting world of bureaucracy! Your contractor will help navigate the permit process, which varies significantly by location. Some areas have streamlined online systems, while others still operate like it’s 1985. The key is starting this process early, as permit delays are one of the most common reasons installations get pushed back.
Choosing Your System Design and Contractor
Not all septic systems are created equal. Based on your soil test results, household size, and local regulations, you’ll choose between conventional systems, advanced treatment units, or specialty designs like mound systems. This is also when you’ll select your contractor – and remember, the lowest bid isn’t always the best choice when you’re dealing with something this important.
“The biggest mistake homeowners make is rushing the planning phase. Taking time to properly evaluate soil conditions and choose the right system design prevents costly problems down the road.”
– Sarah Martinez, Licensed Site Evaluator
Week 2: Planning & Design Finalization
Finalizing System Layout and Specifications
This week is all about turning test results into actionable plans. Your contractor will work with engineers to design a system that works with your specific soil conditions, property layout, and household needs. This includes determining tank size, drainfield configuration, and placement of all components.
Pay attention during this phase and ask questions. Understanding your system layout now will help you maintain it properly later – and trust me, future you will appreciate knowing exactly where everything is buried.
Submitting Plans for Approval
Your detailed plans head off to the local health department or regulatory agency for review. This process can take anywhere from a few days to several weeks, depending on your local agency’s workload and the complexity of your system. Cross your fingers for a quick turnaround, but don’t panic if it takes longer.
Scheduling Construction
Once approvals are in hand, your contractor will schedule the actual installation. This involves coordinating with excavation crews, inspectors, and material suppliers. Weather can be a wild card here – nobody wants to install a septic system in a muddy mess, so flexibility is key.
Week 3: Excavation and Installation Begins
Site Preparation
The real fun begins! Crews will mark utility lines, set up equipment, and prepare the installation area. If you’ve ever wondered what your yard would look like as a construction zone, you’re about to find out. This is typically the loudest phase of the process, so warn your neighbors and maybe invest in some good earplugs.
Excavation Work
Large excavating equipment moves in to dig the holes for your tank and drainfield trenches. Modern GPS technology helps ensure precise placement, but there’s still something impressively dramatic about watching a huge machine dig a hole exactly where your wastewater will be processed for the next 20-30 years.
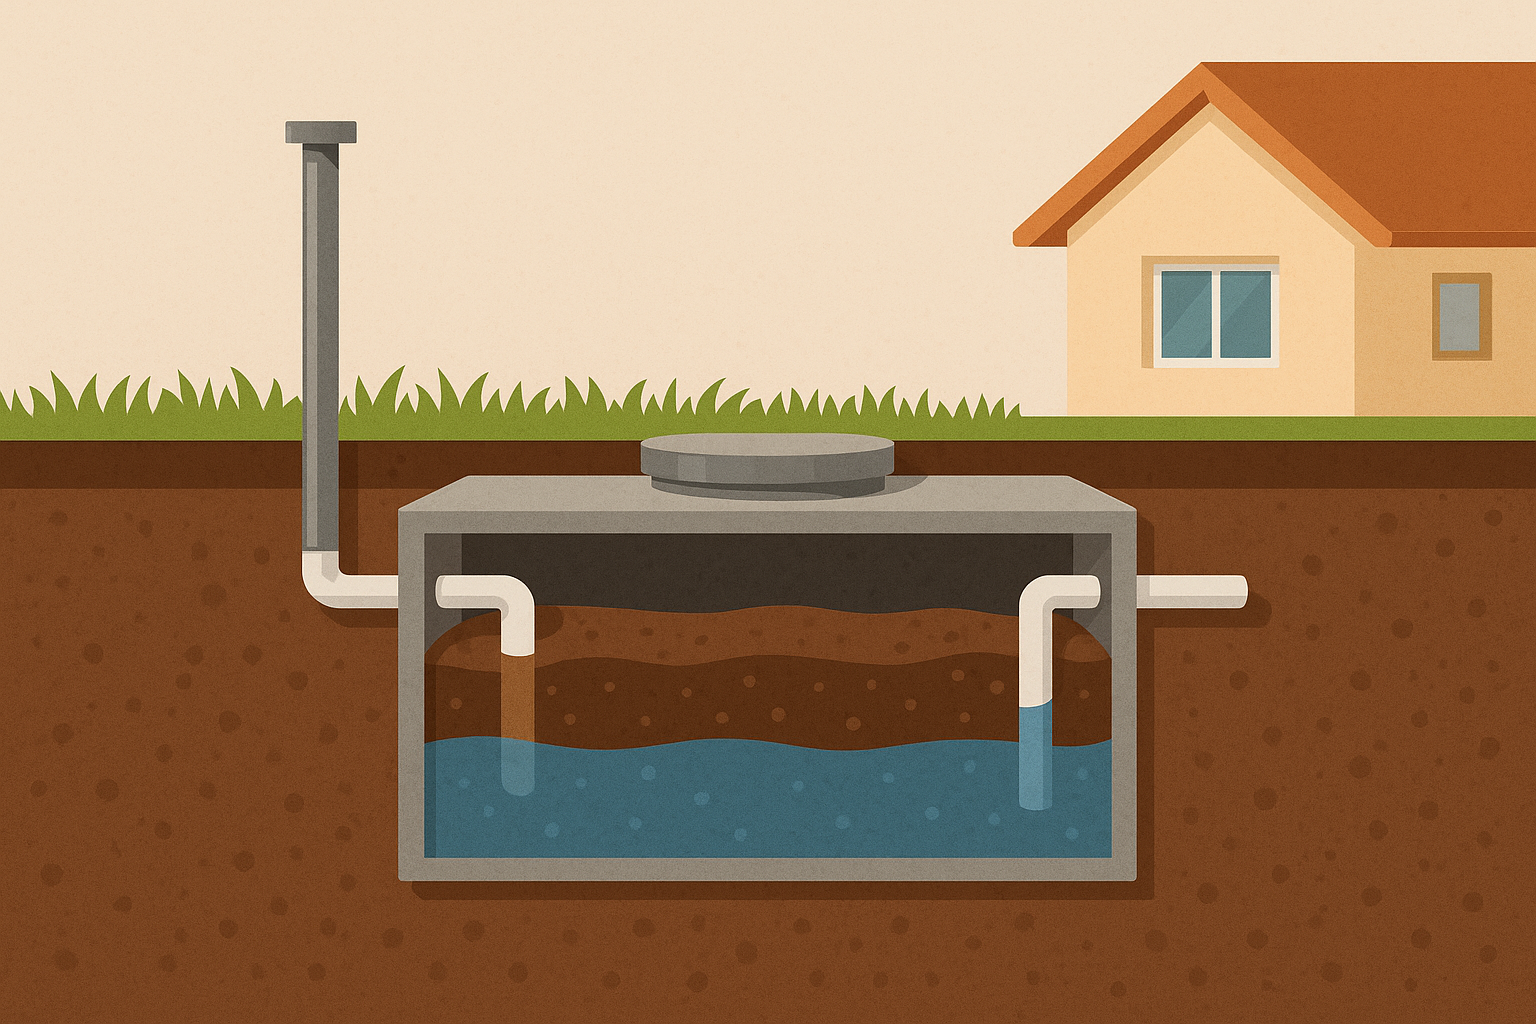
Septic Tank Installation
Your new tank arrives and gets carefully lowered into its new underground home. Whether you’ve chosen concrete, fiberglass, or plastic, proper installation is crucial. The tank must be level, properly supported, and positioned correctly for optimal function.
Week 4: Drainfield and System Connections
Drainfield Installation
The drainfield is where the magic happens – this is where your wastewater gets naturally filtered and returned to the groundwater. Installation involves laying distribution boxes, pipes, and gravel beds according to your approved design. Precision matters here, as improper slopes or spacing can cause system failure.
Plumbing and Component Connections
All the pieces get connected during this phase. Pipes are joined, electrical connections made (for systems requiring pumps), and all components integrated into a functioning whole. This is detail-oriented work that requires experienced professionals – not the time for DIY heroics.
System Testing and Initial Inspection
Before anything gets buried permanently, inspectors verify that everything is installed correctly. This includes checking pipe slopes, connections, and overall system integrity. Think of it as a final dress rehearsal before the real show begins.
“Proper installation of the drainfield is absolutely critical. We see too many systems fail prematurely because corners were cut during this phase. Quality installation here literally determines whether your system lasts 15 years or 30 years.”
– Mike Thompson, Master Plumber and Septic Installation Specialist
Week 5: Backfilling and Final Inspections
Backfilling Operations
Once everything passes inspection, crews carefully backfill around the tank and over the drainfield. This isn’t just dumping dirt back in the holes – proper backfilling techniques protect your system components and ensure optimal performance. The right materials and compaction methods make all the difference.
Final Inspection Scheduling
Your local health department or regulatory agency conducts a final inspection to verify everything meets code requirements. This is the official stamp of approval that allows you to actually use your new system. Schedule this as soon as possible, as inspector availability can sometimes cause delays.
System Approval and Startup
Congratulations – you’re officially approved for operation! Your contractor will walk you through system startup procedures and initial operation guidelines. This is when you can finally reconnect to your new system and say goodbye to any temporary arrangements you’ve been using.
Week 6: Post-Installation and Site Restoration
Landscaping and Site Restoration
Your yard has been through a lot, and now it’s time for some TLC. Crews will restore grading, reseed disturbed areas, and generally make your property look less like a construction zone. Keep in mind that full landscaping recovery can take several months, especially if installation occurred during dormant growing seasons.
Homeowner Education
This is arguably the most important part of the entire process. Your contractor should provide comprehensive education on system operation, maintenance requirements, and warning signs to watch for. Pay attention – proper maintenance starts from day one and determines how long your investment will serve you.
Maintenance Schedule Setup
Smart homeowners establish their maintenance routine immediately. This includes scheduling your first pumping (typically in 3-5 years), annual inspections for advanced systems, and ongoing monitoring of system performance. Think of it as preventive medicine for your septic system.
Common Delays and How to Avoid Them
Weather-Related Setbacks
Mother Nature doesn’t care about your installation timeline. Heavy rain, frozen ground, or extreme heat can all cause delays. The best defense is flexible scheduling and working with contractors who understand local weather patterns.
Permit Processing Delays
Bureaucracy moves at its own pace, especially during busy seasons or when agencies are short-staffed. Submit permits as early as possible and maintain regular contact with your contractor about processing status.
Supply Chain Issues
While less common than in other industries, septic components can sometimes be backordered. Working with established contractors who maintain good supplier relationships helps minimize these risks.
“The most successful installations happen when homeowners understand that flexibility is key. Weather delays, permit processing times, and other factors are often beyond anyone’s control. Planning for a six to eight-week timeline instead of exactly six weeks prevents frustration and allows for quality work.”
– Jennifer Walsh, Environmental Health Specialist
Tips for Keeping Your Project on Track
Start the permit process as early as possible – this is usually the longest single step in the timeline. Maintain clear communication with your contractor and ask for regular updates. Keep your property accessible for crews and inspectors, and be prepared for some temporary inconvenience.
Consider the timing of your installation carefully. Spring and fall often provide the best weather conditions, but these are also the busiest seasons for contractors. Winter installations are possible in many areas but may take longer due to weather delays.
Wrapping Up Your Septic Installation Journey
Installing a septic system is a significant undertaking, but understanding the six-week timeline helps set realistic expectations and reduces stress. From initial soil testing through final inspections and site restoration, each phase builds toward a functioning system that will serve your household for decades.
The key to success lies in proper planning, working with qualified professionals, and maintaining realistic expectations about timing. Yes, six weeks might seem like a long time, but considering you’re installing infrastructure that should last 20-30 years, it’s a relatively small investment in time for such a crucial system.
Remember that every property and installation is unique. Your timeline might be shorter if everything goes smoothly, or longer if you encounter complications. The important thing is ensuring the job is done right, because when it comes to septic systems, quality installation is far more valuable than speed. Take the time to do it properly now, and you’ll enjoy reliable, trouble-free operation for years to come.